


Cart
0

Dress in a three-layer system: a moisture-wicking base, an insulating mid-layer, and a protective outer shell. Skip cotton entirely next to your skin. This trio, built to add or shed layers as your effort changes, covers the vast majority of trail conditions you’ll ever face.
Before anything else, get these three things right:
- Upper body: merino or synthetic base layer, fleece or packable puffy mid, wind/rain shell in your pack.
- Lower body: quick-dry hiking pants or leggings, with rain pants only if the forecast calls for it.
- Feet: moisture-wicking socks (never cotton) matched to trail runners or boots based on terrain.
Pack for the coldest hour of your hike at trail elevation, not the temperature at the trailhead parking lot, and bring a rain shell no matter what the forecast says.
Key Takeaways
A functional hiking outfit depends on a three-layer system, moisture-wicking base, insulating mid, protective shell, with cotton eliminated entirely from anything touching your skin.
| Point | Details |
|---|---|
| Layer for adjustability | Base wicks sweat, mid traps heat, shell blocks wind and rain; add or remove as effort changes. |
| Skip cotton completely | Cotton retains moisture and accelerates chilling; choose merino or synthetic instead. |
| Pack a shell every time | Bring a rain/wind shell regardless of forecast, and dress for the coldest hour at trail elevation. |
| Match shoes to terrain | Trail runners breathe better for most day hikes; boots earn their place on technical or wet terrain. |
| Buy base and shell first | CAS7MFOCUS offers everyday-friendly base layers and packable jackets that double as trail starter pieces. |
Table of Contents
- Why a Hiking Outfit Guide Starts With Layering
- Choosing Base, Mid, and Shell Layers
- What to Wear Hiking by Temperature and Season
- Boots or Trail Runners: What Should You Wear on Your Feet?
- Accessories That Change a Day Hike
- What Not to Wear Hiking
- How to Judge Fabric and Fit Without the Marketing Hype
- Building a Pack List and Prioritizing Purchases
- Tradeoffs You Only Learn After Enough Miles
- Considerations for Gender-Specific Hiking Clothing
- Keeping Your Hiking Clothes Working Longer
- Shop Your Starter Hiking Outfit
- Sources
- FAQ
Why a Hiking Outfit Guide Starts With Layering
Layering works because your body is a variable heat engine, not a thermostat. You generate more heat climbing a switchback than you do standing at a scenic overlook, and a single heavy jacket can’t handle both moments. Three thinner layers can.
Each layer has one job. The base layer pulls sweat off your skin so it can evaporate instead of sitting there cooling you down. The mid-layer traps the warm air your body produces, holding it close like insulation in a wall. The shell blocks wind and precipitation from stripping that warmth away. Strip out any one piece and the system breaks down fast, especially the shell, since wind alone can drop your effective temperature by 10 to 20 degrees on an exposed ridge.
Here’s the exchange happening against your skin on every hike:
- Sweat leaves your body as vapor or liquid.
- A wicking base layer pulls it to the fabric surface.
- Airflow and mid-layer breathability let it evaporate.
- A shell keeps rain and wind from reversing the process.
Fabric choice changes how fast that cycle runs. In one side-by-side sink-wash comparison, polyester dried roughly 40% faster than merino wool, 34 minutes versus 48. That gap matters more than most hikers realize when you’re re-wearing a shirt on day two of a backpacking trip or drying gear overnight at camp.
Choosing Base, Mid, and Shell Layers
Getting the layer-by-layer choices right is where most hiking outfit guides get vague. Here’s the specific reasoning for each piece.
Base layer: what touches your skin
Your base layer options come down to merino wool or synthetic (polyester or nylon blends). Merino regulates temperature across a wider range, resists odor for days, and keeps insulating even when wet, which makes it the stronger pick for multi-day trips where you won’t be doing laundry. Synthetic costs less, dries faster, and works fine for day hikes where you’ll wash it that night anyway.
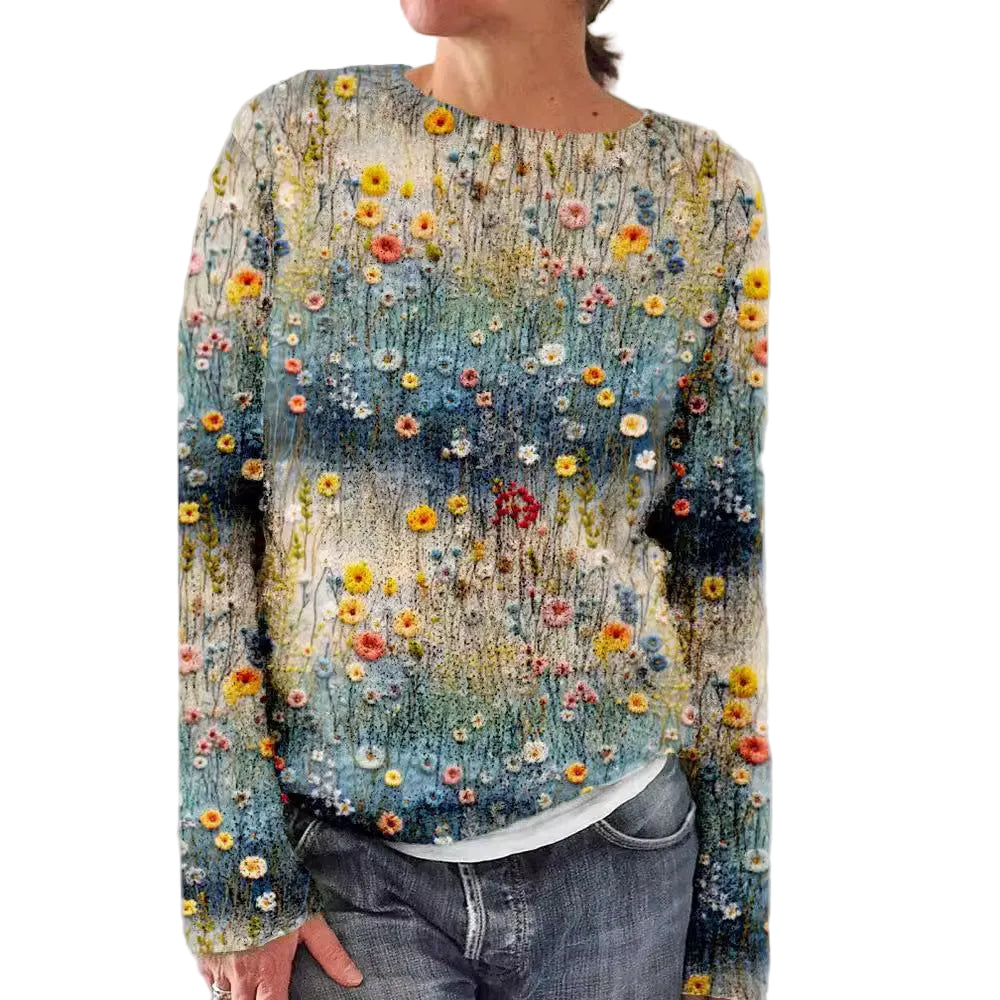
Fit should be snug but not compressive. A base layer that’s too loose can’t wick efficiently because it’s not making consistent contact with your skin. Go long sleeve below 60°F or on exposed, sun-heavy terrain; short sleeve for anything warmer where sun protection isn’t a concern.
Mid layer: your adjustable furnace
Fleece remains the workhorse choice for active hikers because it breathes well during effort, dries fast, and keeps working even when damp. A 100-weight fleece suits mild days and high-output climbs; 200-weight fits colder, slower-paced hikes. Synthetic puffy jackets compress smaller and outperform down when wet, making them the safer choice for anywhere rain is likely. Down still wins on warmth-to-weight in genuinely dry, cold conditions, but it’s a liability the moment it gets soaked.
Pro Tip: Carry your mid-layer in your pack rather than wearing it while moving. You’ll warm up within ten minutes on most climbs, and pulling it on only at rest stops keeps you from sweating through your base layer.
Shell layer: your weather insurance
Many experienced hikers carry a softshell as their default outer layer and save the hardshell for days with sustained rain in the forecast. Softshells breathe better and move with you; hardshells with waterproof membranes and pit zips block weather completely but trap more heat and moisture during hard efforts. Packability matters here too. A shell that compresses to the size of a water bottle gets carried every time; one that eats a third of your pack gets left in the car.
Lower body: pants, leggings, and rain pants
For pants, nylon holds up better against brush and rock scrambling thanks to its abrasion resistance, while polyester dries faster after a creek crossing. Zippered thigh vents often do more for cooling during hard climbs than fabric breathability alone, so look for vent zips if you run hot. Leggings or thermal bottoms work under pants in cold weather; rain pants belong in your pack whenever precipitation is possible, even if you never wear them.
| Layer | Best fabric | Key feature to check | Weight priority |
|---|---|---|---|
| Base layer | Merino (multi-day) or polyester (day hikes) | Snug fit, flat seams | Light |
| Mid layer | Fleece or synthetic puffy | Compressibility, breathability | Light to medium |
| Shell (upper) | Softshell or hardshell with DWR | Pit zips, packable hood | Depends on forecast |
| Pants | Nylon or polyester blend | Vent zips, articulated knees | Medium |
What to Wear Hiking by Temperature and Season
Once you understand the mechanics, applying them to a specific day gets simple. Match your outfit to the coldest temperature band you’ll hit, not the average for the day.
| Temperature band | Upper body | Lower body | Extras |
|---|---|---|---|
| Above 75°F | Lightweight sun-protective synthetic shirt | Breathable shorts or convertible pants | Sun hat, sunglasses, shell in pack |
| 60 to 75°F | Short-sleeve base, light layer in pack | Hiking pants or shorts | Light gloves for early starts |
| 40 to 60°F | Long-sleeve base plus fleece | Hiking pants, thermal option in pack | Beanie, buff, shell |
| Below 40°F | Full three-layer system, insulated bottoms | Insulated or lined pants, rain pants in pack | Insulated gloves, warm hat, gaiters |
That top-band recommendation isn’t a shortcut. Dressing lighter above 75°F while still packing a shell keeps you covered if you climb into cloud cover or the trail runs later than planned.
Shoulder-season hikes deserve special attention. Spring and fall days can swing 30 to 40°F between morning and afternoon, and it’s common to layer on and off several times before lunch. Pack the mid-layer even when you’re confident you won’t need it while moving; you’ll likely need it the moment you stop for a break.
Elevation changes the math too. A trailhead forecast at 2,000 feet tells you almost nothing about conditions at a 6,000-foot summit. Check the forecast for your actual destination elevation, not the town nearest the parking lot, and dress for the coldest hour you’ll spend up there.
Boots or Trail Runners: What Should You Wear on Your Feet?
Footwear decides your day more than any other single choice. For most three-season day hikes, trail runners outperform waterproof boots on breathability and drying speed, and waterproof membranes can actually trap sweat inside the shoe during warm, humid stretches, leaving your feet wetter than if you’d worn a breathable mesh shoe through a shallow creek. Boots still earn their place on rocky, technical terrain, with a heavy pack, or in cold, wet conditions where ankle support and insulation outweigh breathability. Our hiking boots guide breaks down specific features to look for if you’re leaning toward boots for your next trip.
| Factor | Trail runners | Hiking boots |
|---|---|---|
| Breathability | Higher | Lower, especially waterproof models |
| Ankle support | Minimal | Moderate to high |
| Best for | Day hikes, warm/humid climates | Heavy packs, rocky terrain, cold/wet conditions |
| Break-in time | Little to none | Days to weeks |
Socks matter almost as much as the shoe. Merino or synthetic socks wick moisture and cushion pressure points; cotton socks hold sweat against your skin and are one of the fastest routes to a blister. A thin liner sock under a cushioned hiking sock reduces friction on longer days.
For blister prevention, lace your boots or shoes with a heel-lock technique, crossing the laces through the top hooks to snug your heel into the back of the shoe. Break in new footwear on short walks before committing to a long day. Before you leave the trailhead, run this quick check:
- Toe box has roughly a thumb’s width of room past your longest toe.
- Laces are snug at the ankle, not just the forefoot.
- Socks are dry and free of bunching or seams under pressure points.
Accessories That Change a Day Hike
Small items carry outsized weight in how comfortable you feel on trail. A brimmed hat and sunglasses cut glare and sunburn risk on exposed ridgelines; a light beanie and buff handle cold mornings and windy summits without adding bulk. Thin liner gloves are cheap insurance against numb fingers at elevation, even in summer.
- Gaiters keep debris, mud, and light snow out of your shoes on rough terrain.
- Packable waterproof overpants earn their pack space on any day with a rain forecast above 40%.
- Packable mittens outperform gloves for pure warmth on genuinely cold summit pushes.
- A thin foam sit pad turns any rock or log into a dry lunch spot.
- A small blister kit with tape and antiseptic wipes weighs almost nothing and solves real problems fast.
- Trekking poles reduce knee strain on steep descents, especially with a loaded pack.
None of these replace the core three-layer system, but they’re the difference between a fine day and a genuinely comfortable one.
What Not to Wear Hiking
Cotton is the single biggest mistake in this whole hiking outfit guide, and it’s worth being blunt about why. Cotton absorbs sweat and rain and holds onto it, and wet cotton against your skin pulls heat away from your body far faster than a dry or synthetic equivalent. A cotton t-shirt on a warm morning hike feels fine until clouds roll in or you hit a stream crossing, and suddenly you’re wearing a cold, clinging sponge for the next three miles.
Other common mistakes:
- New, unbroken-in shoes: blisters within the first mile, guaranteed on longer trails.
- Heavy denim jeans: they don’t stretch, they dry slowly, and they chafe on repetitive motion.
- Cotton socks: same moisture problem as cotton shirts, concentrated on the part of your body most prone to blisters.
- No backup layer: skipping the packed shell “because it looks sunny” is the most common regret hikers report after an unexpected weather shift.
The fix for most of these is simple substitution. Swap the cotton tee for a synthetic or merino equivalent, swap jeans for nylon or polyester hiking pants, and always toss the shell in regardless of the forecast.
How to Judge Fabric and Fit Without the Marketing Hype
Two acronyms matter more than brand names when you’re evaluating gear: DWR and MVTR. DWR (durable water repellent) is a coating applied to fabric that makes water bead up and roll off rather than soak in. A DWR-only shell handles light rain and wind fine but wets out under sustained downpours. A garment with a genuine waterproof membrane underneath the DWR coating, not just the coating alone, holds up through hours of steady rain.
MVTR (moisture vapor transmission rate) measures how much sweat vapor a fabric lets escape. Higher MVTR generally means a shirt or shell feels less swampy during hard effort, though pit zips and vent zips often do more real-world work than the fabric spec alone.
For insulation, the down-versus-synthetic decision comes down to conditions, not preference. Down offers the best warmth for its weight in cold, dry climates. Synthetic insulation weighs slightly more for the same warmth but keeps performing when wet, which makes it the safer default anywhere rain is a real possibility.
Fit checklist worth running through before you buy:
- Base layer sits snug against skin without restricting your arm swing.
- Mid-layer has enough room to layer over the base without feeling tight.
- Shell fits loosely enough to layer under it, with a hood that adjusts and doesn’t block peripheral vision.
- Pants have room at the knee (articulated or gusseted) for a full stride on steep terrain.
- Sleeve and pant length clear your gloves and boots without excess fabric bunching.
On spending priority: put your money into the base layer and shell first, since those two purchases deliver the biggest jump in comfort and safety for the dollar. Mid-layers, pants, and accessories can come from budget lines without much performance loss.
Building a Pack List and Prioritizing Purchases
A hiking outfit guide is only useful if it turns into a packing list you can act on. Here’s the must-have versus nice-to-have breakdown for a day hike or short overnight.
| Category | Must-have | Nice-to-have |
|---|---|---|
| Upper body | Wicking base layer, packable shell | Mid-weight fleece, sun hoodie |
| Lower body | Quick-dry pants or shorts | Rain pants, thermal leggings |
| Feet | Non-cotton socks, broken-in shoes | Liner socks, gaiters |
| Accessories | Sun hat, sunglasses | Trekking poles, sit pad, blister kit |
| Weather backup | Rain shell (always) | Packable mittens, waterproof overpants |
Build your kit in this order: base layer and rain shell first, then quality socks and footwear, then mid-layer and accessories. This sequencing follows the actual risk hierarchy on trail: getting cold and wet is dangerous, blisters end trips early, and everything else is comfort on top of that foundation.
Budget realistically. Spend where performance really diverges (base layer fabric, shell waterproofing, footwear fit) and save where it doesn’t matter as much (a basic fleece from a budget line performs nearly as well as a premium one for most day hikes). For deeper technical layering principles that apply beyond hiking, this layered clothing breakdown from FS9 Tactical covers durability-focused layering choices worth understanding.
Tradeoffs You Only Learn After Enough Miles
Gear specs tell you half the story. The other half shows up after enough trail days, in tradeoffs that don’t show up in a product description.
Waterproof boots feel like the obvious safe choice until you’re three miles into a humid August hike and your feet are soaked from the inside out. Breathable trail runners often keep feet drier overall in warm conditions because sweat vapor can escape instead of condensing inside a sealed membrane. Save the waterproof boots for cold, wet, technical terrain where insulation and support outweigh breathability.
Merino makes sense for a five-day backpacking trip where you can’t do laundry and odor control matters. For a single day hike, synthetic often wins on pure packing math: it dries faster if it gets sweaty or rained on, and you’re washing it that evening anyway, so odor resistance barely matters.
- Choose boots for loaded packs and loose talus, trail runners for day hikes and maintained trails.
- Choose merino for multi-day trips, synthetic for single-day speed and cost savings.
- Choose a softshell for most days, a hardshell only when the forecast turns genuinely wet.
Pro Tip: Roll your rain shell around your first-aid kit or map instead of stuffing it loose in your pack. You’ll always know exactly where it is when the sky turns, and you save the ten seconds of digging that turns a light drizzle into a soaked base layer.
Considerations for Gender-Specific Hiking Clothing
Fit differences between men’s and women’s hiking clothing come down to more than sizing labels. Women’s-specific cuts typically build in a narrower shoulder-to-hip ratio, higher-rise waistbands on pants, and shorter torso lengths on jackets and base layers, which affects how well a shell seals at the waist or how a pack’s hip belt sits. Men’s cuts generally run straighter through the torso and longer in the sleeve and inseam.
Neither is objectively better; the goal is matching the cut to your actual body rather than defaulting to whichever section of the store you usually shop. A women’s-cut jacket on a broader-shouldered frame will bind at the arms regardless of brand, and a men’s-cut base layer on a narrower frame will bunch at the waist under a hip belt. Try layering pieces together in-store when possible, since a jacket that fits well alone can still feel tight once you add a fleece and base layer underneath it. Kids’ hiking layers follow the same three-layer logic at a smaller scale. Skip cotton for the same reasons, and size mid-layers slightly loose since kids run warmer and shed layers more often mid-hike.
Keeping Your Hiking Clothes Working Longer
A well-built hiking outfit only performs as advertised if you take care of it. DWR coatings wear off with repeated washing and abrasion, and the fix is straightforward: wash shells in a technical detergent (never regular fabric softener, which clogs the fabric’s pores) and reapply a DWR treatment every few months if you notice water soaking in rather than beading up.
Merino base layers hold up best with cold water washes and air drying; high heat in a dryer breaks down the wool fibers over time and shortens the garment’s life. Fleece and synthetic puffies should be washed inside out to protect zippers and face fabric, and puffy jackets need occasional fluffing in a low-heat dryer with a couple of clean tennis balls to redistribute clumped insulation.
Store shells and puffies loosely rather than compressed in a stuff sack long-term, since permanent compression breaks down loft and insulating power. Check zippers and seam tape on shells each season, since failed seam tape is one of the most common (and most fixable) reasons a “waterproof” jacket starts leaking.
How the Author Builds a Versatile Hiking Wardrobe
My own approach to building a hiking wardrobe follows a simple rule: buy the base layer and the shell first, in the best quality you can afford, and treat everything else as replaceable. That’s the advice this whole guide keeps coming back to for good reason, it’s the sequencing that actually holds up across different trail types and seasons. I also keep one pair of shoes strictly for the trail and a separate pair for everything else, which sounds fussy until you realize how much dirt, moisture, and wear a dedicated trail shoe absorbs over a season. Across a range of terrain and weather, from dry ridgelines to soaked shoulder-season trails, the pieces that earned their place in my pack were never the flashiest ones. They were the ones that did their one job without fuss, wash after wash, season after season.
Shop Your Starter Hiking Outfit
Building your first real hiking kit doesn’t require ten separate purchases before your next trip. CAS7MFOCUS carries comfortable base layers and packable outer pieces built for everyday wear that transition easily onto the trail, without the premium price tag of a technical-only outdoor brand.

A practical starter outfit looks like this: a breathable, loose-fit top for your base layer, a lightweight jacket you can stuff into a daypack for wind and light rain, and a pair of non-cotton socks from your existing gear drawer. If you’re outfitting a whole household for weekend hikes, our European and American style trendy jacket works as a packable layer that also holds up for everyday errands, so it earns its space in your closet on non-hiking days too. Browse the full CAS7MFOCUS collection to build out your base-and-shell combo before your next trailhead trip.
Sources
- Clothes for Multiday Hiking — Mid/Insulation Layers | SlowerHiking
- What to Wear Hiking: Trail Outfit Guide by Season | Peak Gear Guide
- What to Wear Hiking | East Coast Hiker
- Best Fabrics for Travel Clothes | Pack Lightly
FAQ
What Should a Beginner Wear for Hiking?
A beginner should wear a moisture-wicking base layer, a packable mid-layer like fleece, and a rain shell, paired with non-cotton socks and broken-in shoes or trail runners. Skip jeans and cotton shirts entirely.
What Is the Proper Attire for Hiking?
Proper hiking attire follows the three-layer system: a wicking base against your skin, an insulating mid-layer for warmth, and a wind or rain shell on top, adjusted for the temperature band you’re hiking in.
What Is the 20% Rule for Backpacking?
The 20% rule commonly refers to keeping your pack weight at or below 20% of your body weight for comfortable long-distance travel; definitions vary slightly, so treat it as a general guideline rather than a fixed threshold.
What Is the Number One Etiquette Rule While Hiking?
The most widely cited trail etiquette rule is that hikers heading uphill get the right of way, since it’s harder for them to regain momentum than it is for a downhill hiker to pause and step aside.
Should I Choose Merino or Synthetic for My Base Layer?
Choose merino for multi-day trips where odor resistance matters, since it keeps insulating even when damp; choose synthetic for single-day hikes where fast drying and lower cost matter more.

